Difference between revisions of "Installing SME"
| Line 129: | Line 129: | ||
[[File:Confirm.png]] | [[File:Confirm.png]] | ||
| + | * Click 'Yes' | ||
| − | <br> Update | + | <br>Enter verify630 in the Update Password field and click OK. |
<br>[[File:EnterUpdatePassword.png]] | <br>[[File:EnterUpdatePassword.png]] | ||
| − | |||
* Click 'Yes' at the following Prompt | * Click 'Yes' at the following Prompt | ||
Revision as of 18:08, 6 November 2013
Topics Covered
- Installing and Configuring MS SQL Server Installation – MS SQL 2005 SP3, 2008 R2.
- Installing SME as stand alone or on an Application Server.
- SME Application – SME executable.
- Common Files – SME Database related files location. Typically this location contains the database. When installing the database on a server that is separate from the application this folder will be referenced as the common files folder on the Application Server.
- Client setup – configuring SME to run across the network from client computers.
Terms
- Application/File server – server from Which SME will be launched for client log in hosting SME executable. (Can also host the database).
- Database server – server hosting the SME database (Can be the same as the application server or on another server).
- Common Files – folder where data related files are stored. This is the default database location on servers/computers hosting both the database and the application.
- Alias62.ini – file containing the connection information allowing SME to connect to the database.
Steps
- Install or configure MS SQL.
- Configure the SME database for remote connections in MS SQL Configuration Utility and in MS SQL Server Management Studio.
- Configure MS SQL instance for ‘CLR’ Dot Net common language runtime access.
- Install SME on the Application/File Server.
- Create the Alias62.ini from the Application/File server while on the Data Server to allow SME connection to the database.
- Create or move the database either on the local computer or on the database server.
MS SQL Server Installation
SME utilizes MS SQL Server for the database management. MS SQL Server must be installed and correctly configured before SME is installed. SME is compatible with MS SQL 2005 SP3, SQL Server 2008, SQL Server 2008 R2, Express or Enterprise versions. High5 Software recommends installing MS SQL 2008 R2 to attain the latest functionality for SQL Server. The free Express version of MS SQL 2008 R2 ‘Database with Advanced Features’ is available at the following link:
For server requirements consult the following Microsoft website ‘Hardware and Software Requirements for Installing SQL Server 2008 R2’.
http://msdn.microsoft.com/en-us/library/ms143506.aspx
2. Note: For security reasons, Microsoft recommends that you do not install SQL Server 2008 R2 on a domain controller. SQL Server Setup will not block installation however you will be cautioned against the installation.
3. For installation instructions consult the Microsoft MSDN ‘How to: Install SQL Server 2008 R2 (Setup)‘ at http://msdn.microsoft.com/en-us/library/ms143219.aspx
4. For a detailed installation step-by-step consult the following link:
5. http://www.mytechmantra.com/LearnSQLServer/Install_SQL_Server_2008_R2_P1.html
Should you require assistance with the installation of MS SQL Server High 5 Software is available to assist.
After MS SQL is installed, configure the following settings:
- MS SQL 2005 SP3 and MS SQL 2008, 2008 R2.
- Open SQL Server Configuration Manager (Start> Run> MS SQL Server 2005> Configuration Tools> SQL Server Configuration Manager)
- Review the installed Services
- SQL Server - Data base server
- Full Text Search (This must be installed for SME to use advanced search functions)
- If using SQL Enterprise, start the MS SQL Agent.
- Expand SQL Service Network Configuration
- Click on Protocols for your instance name
- Enable Names Pipes
- Enalbe TCP/IP
- Right click on TCP/IP and select Properties.
- Enable TCP on the ports (which ports depends on your server setup)
- Clear the '0' from the TCP Dynamic field
- Enter '1433' into the TCP Port (this may need ot be assigned to a different port if 1433 is consumed by another SQL instance)
- Click OK. (You will be warned about stopping and starting the SQL Service)
- Stop and restart the SQL Server instance.
- Close the Configuration Manager
2. Launch MS SQL Management Studio
- Connect to your SQL instance.
- Right click on SQL Server you have selected
- Select Properites and select the 'Connections' page
- Make sure that the 'Remote Server Connections' - 'Allow remote connections to this server' has been selected.
- Click on the 'Security page and make sure 'SQL Server and Windows Authentication mode' is selected
Should you require assistance with configuration, High 5 Software is available to assist.
Install SME on the Application/File server
- Download the SME installer from the following link:
http://high5software.com/downloads/sme72/SME5andSQLinkSetup.exe
- Install SME with the following expections
- Do not launch SME when the installation completes.
- Do not create a database at this time
- Delete any Alias62.ini files in the High5Software installation folder.
- SME default installation is at the location referenced below. If you install into another location, change your file paths accordingly
- Create a new folder in the C:\User\Public\High5Software\Data for your company database as C:\Users\Public\High5Software\Data\<YourCompany>. This will be the 'Common Files' location.
Launch SME and create the database
If you are setting up a new database or connecting to an existing database that resides on another server such as a Data Server you must log on to the server, browse via UNC/Network to the Application Server SME folder and launch SME from the sme5.exe executable.
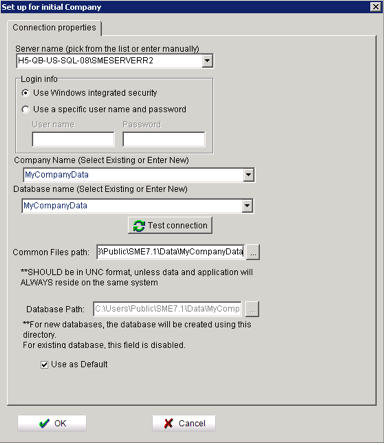
- Connection Properties:
- Server Name (Pick from the list or enter manually) - Select your MS SQL Server instance
- Login info:
- For new databases set to: 'Use Windows integrated security' until the database has been built.
- For existing databases, you may need to use SQL Authentication- 'Use a specific name and password'. Not that Step 5 below explains setting up a SQL login.
- Database Name/Company Name
- First, Type your database name in the 'Database Name' field or if connecting to an existing database, select it from the list. (Note: On SQL 2008 your permission settings MUST be properly configured to allow for selection of the database).
- If connecting to an existing database that is running under the MS SQL Server instance the database will be in the dropdown.
- Second, Cop and paste the Database name into the 'Company Name' field or select from the dropdown.
- Common File Path
- Browse to the location of the 'Common Files' set in step '1-h' and if the database is on the same server use the local/physical drive path for the new databases: C:\Users\Public\High5Software\Data\<MyCompany>
- Note: if you are connecting from another server or connecting to an existing database, use the UNC path: \\ServerName:\Users\Public\High5Software\Data\<MyCompany>
- Database Path
- For New Databases: Browse to the location of the 'Common Files' set in step '1-h' and if the database is on the same server use the local/physical drive path for new databases: C:\Users\Public\High5Software\Data\<MyCompany>
- Note: if you are connecting from another server, use the UNC path: \\ServerName:\Users\Public\High5Software\Data\<MyCompany>
- Your 'Set up for Initial Company' should look like the above screenshot
- Click OK
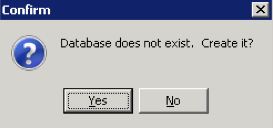
- If creating a new database you will get the following Prompt. If connecting to an existing databse, SME will launch
- Click 'Yes'
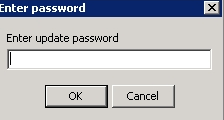
Enter verify630 in the Update Password field and click OK.
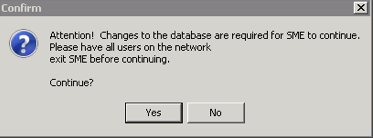
- Click 'Yes' at the following Prompt
- Click No at the following prompt as the database does not yet exist
- You will receive the following prompt when the database has been created.
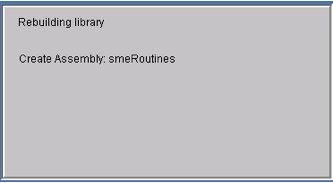
- SME will install the routines/assemblies
- SME will process the tables.
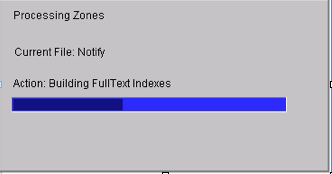
- SME will build the 'Full Text Indexes'
- SME will display the 'Finished' dialogue when it has completed building the routines/assemblies.
Configure the SME database options in MS SQL Management Studio
- Launch the MS SQL Management Studio Express tool
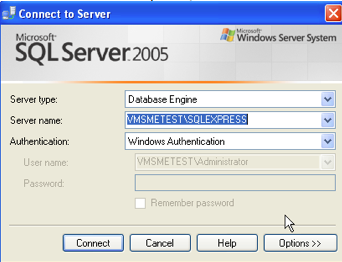
- Click Connect to connect to your SQL Server
Set permissions for SME Assemblies
Perform the following procedure to enable CLR and to set permissions for SME Assemblies
- Paste or type the following into a Query Window in MS SQL Management Studio:
- Click on New Query. (Right below the File Menu item)
- Copy the queries below and paste into the query window.
--- enable clr
sp_configure 'show advanced options', 1; GO
RECONFIGURE;
GO
sp_configure 'clr enabled', 1; GO
RECONFIGURE;
GO
--- set owner to sa
USE [dbname]
EXEC sp_changedbowner 'sa'
GO
--- set trustworthy
ALTER DATABASE [dbname] SET TRUSTWORTHY ON;
Note: you may need to retype the query since copy and paste can include hidden characters that will not allow the query to run.
Click the Execute button
Setting up a SQL Server login
- Go to Logins and select New
- Setup as follows:
- General page:
- Name = SMELogin
- Authentication= SQL Server authentication
- Password - enter a password
- Password Policy
- Uncheck Enforce Password Policy
User Mapping
- Check your database name
- In the role membership window, click Owner
- Click OK
- Check the BuiltIn\Administrators & BuiltIn\User for Database mapping
- User Mapping
- Check your database name
- In the role membership window, click Owner
Routines
SME now utilizes Routines for the database business logic. The routines MUST be present for SME to function properly. To ensure the routines are in place and properly configured, do the following:
- Open MS SQL Management Studio
- Expand the Databases object
- Expand your Database
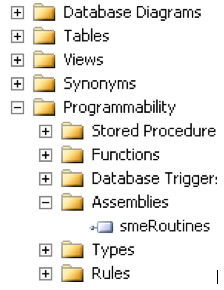
- Expand 'Programmability'
- Expand 'Assemblies'
- smeRoutines must be present. If it is not, contact High 5 Software support @ 360-293-3000 for assistance.

