Difference between revisions of "Accessing Local Files Using Remote Desktop"
| (2 intermediate revisions by the same user not shown) | |||
| Line 19: | Line 19: | ||
<br>'''Accessing Share Drives on Remote Host''' | <br>'''Accessing Share Drives on Remote Host''' | ||
<br>[[File:rd5.png]] | <br>[[File:rd5.png]] | ||
| + | |||
| + | <br>After connecting to the remote machine, open up '''My Computer'''. The drives you have shared will be available as "'''<Letter>''' on '''<Local Machine>'''". They are also available as '''\\tsclient\<Letter>$'''. | ||
Latest revision as of 16:31, 2 April 2014
This tutorial will show you how to mount local computer resources, such as Drives and Printers, on a machine using Remote Desktop for access from your High 5 Cloud Server.
Opening Remote Desktop Connection (Refer to this link for Remote Desktop access instructions)
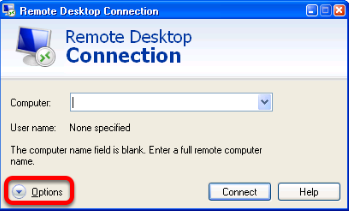
Open up the Remote Desktop Connection, usually found in Start > All Programs > Accessories. Click on the Options button.
Configuring Local Resources
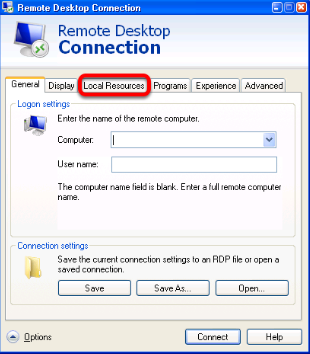
Click on the Local Resources tab.
Configuring Local Devices and Resources
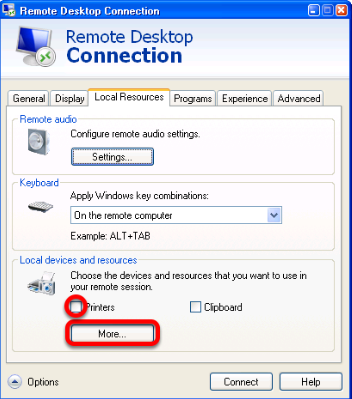
If you would like to share your printers with the remote machine, click the Printers checkbox. Click the More button to open up drive options.
Configuring Shared Drives
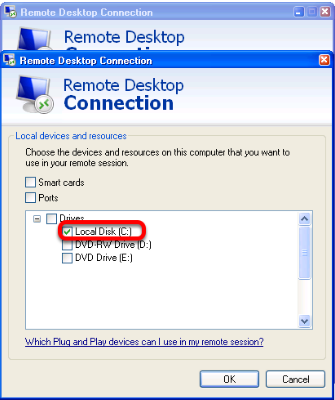
Click the checkboxes for the drives you want to share with the remote machine. In this example we are sharing the C: drive. Click OK then click Connect to connect to your remote machine.
Accessing Share Drives on Remote Host
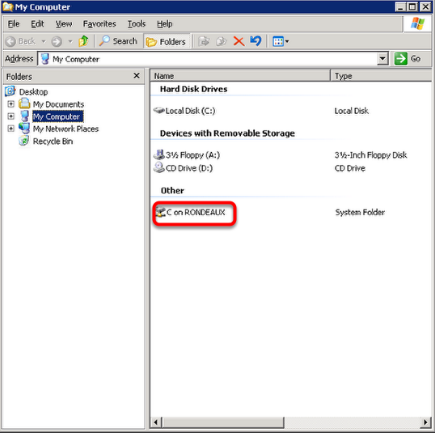
After connecting to the remote machine, open up My Computer. The drives you have shared will be available as "<Letter> on <Local Machine>". They are also available as \\tsclient\<Letter>$.