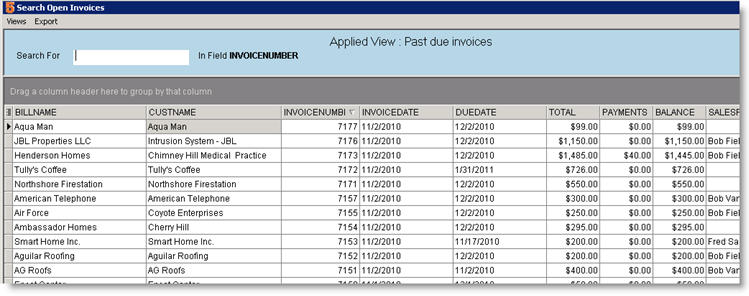
Search Invoices
The search functionality is the same throughout SME. You can search invoices the same way you can search orders, customers and leads. You can choose which columns you are viewing in your search window, sort/group/filter by the data in each column, and export your data to excel. The different search views you setup can be saved for use later. To view a video on searching in SME, click searching tips. In Invoicing, you can click Search to search open invoices, closed invoices or all invoices.
Find all open invoices
- Go to Receivables module > Invoicing.
- Click Search > Search Open Invoices.
OR simply hit F5 on your keyboard to open the same search window showing all open invoices.
To use this search view, go to Invoicing. Click Search > Search View and select your saved view.
- Double click on the invoice you want to open.
- Click on the column headers to sort by the data in the column.
- Add columns to the search window
- Click Views > Add/Remove Fields.
- In the Grid Columns window, check the columns you want to add.
- Click OK.
- To save the new view, click Views > Save View.
Find all overdue invoices
To setup a search view that will show you all overdue invoices:
1. Go to Receivables module > Invoicing. Click Search > Search Open Invoices OR hit F5 on your keyboard to open the search open invoice window.
2. In the Search window, click Views > New View
3. In the Grid Columns window, check the following fields and any other fields you want to include.
- Billname
- CustName
- InvoiceNumber
- InvoiceDate
- DueDate
- Total
- Payments
- Balance
- LateFees
4. Click OK.
5. Rearrange the order of the columns by dragging and dropping the column headers where you want them.
6. Set the column width by clicking your mouse between the column headers and dragging them into position.
7. Click at the bottom of the search window to apply the filter on the due date.
- Click Press the button to add a new condition.
- Click UID and select Due Date.
- Click Equals and select Is Past.
- Click OK.
8. To save the new view, click Views > Save View. Enter a name for your new view and click OK.

