Warehouses
If you are tracking inventory items in SME, it is likely that you have more than one warehouse you want to track stock in such as your technicians vehicles. SME allows you to create multiple warehouses.
- Default Warehouse (main warehouse) you keep and receive stock into.
- Technician warehouses to track stock on your techs trucks/ vans
- Customer Warehouses to hold stock for your customer
Default Warehouse
In SME, there is a warehouse called Default. When creating new inventory items this will be used as the Default Location. You should enter your default warehouse address so it shows correctly on POs created from service and install orders.
Enter the Default Warehouse Address
1. Go to Setup > Company > Orders > Lists
2. Locate Warehouses in the Lists
3. Select Default on the right and click Edit.
4. Enter the address in the window that opens. (image below)
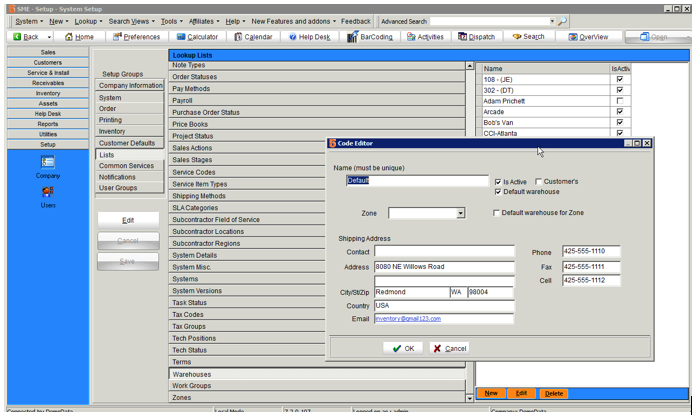
If you want to change the name to something besides "Default" you can.
Technician Warehouses
If you want to track stock in your technicians trucks you will need to create the technician warehouses.
Go to Setup > Company > Orders > Lists
Locate Warehouses in the Lists
Click New in lower right corner and enter the Warehouse name.
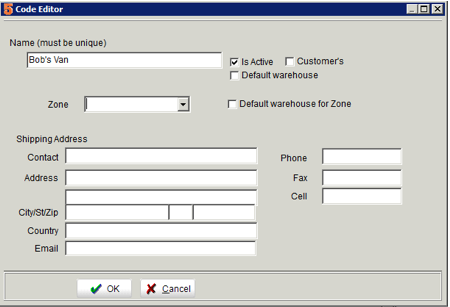
Assign techs their default warehouse for use on Mobile Apps
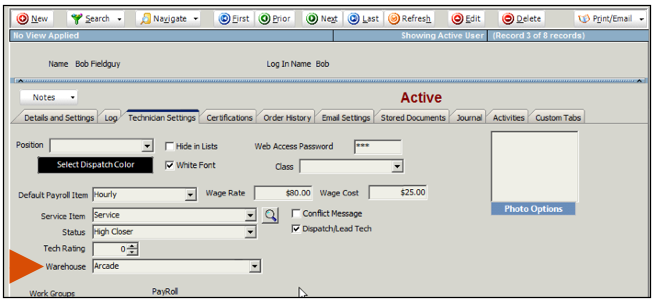
If you are using TechPortal or TechService on Android for SME, you will need to assign the technician warehouse in the tech User. That way, when your tech adds stock from TechPortal or TechService on Android, SME will allocate stock from your technician's default warehouse, rather than the item's default warehouse.
To set a default warehouse for your technician:
1. Go to Setup module > Users
2. Click Search > Search Active Users and select the technician.
3. Click the Technician Settings tab. Locate the Warehouse field and select the warehouse you use for your technician's truck. (image below)
Transferring stock from Default to Technician warehouse
One Item at a time:
1. Go to Inventory item
2. Click Material Details tab
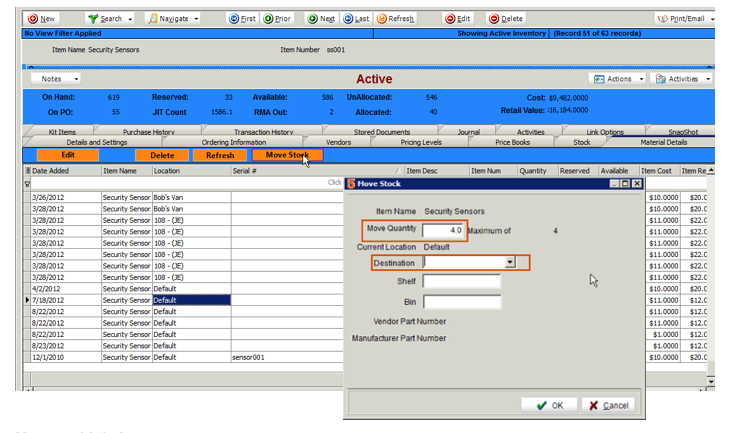
3. Select the line on the grid that contains the stock lot that contains the stock you want to move. Make sure you are selecting stock in the correct location and notice how many are available.
4. Click Move Stock
5. In the Move Stock window, enter the Move Quantity
6. Choose the Destination warehouse
7. Click OK and the stock will be moved.
Move multiple items at once
1. To move multiple items at once, you will need to create a transfer record, select the items and quantities, and transfer them.
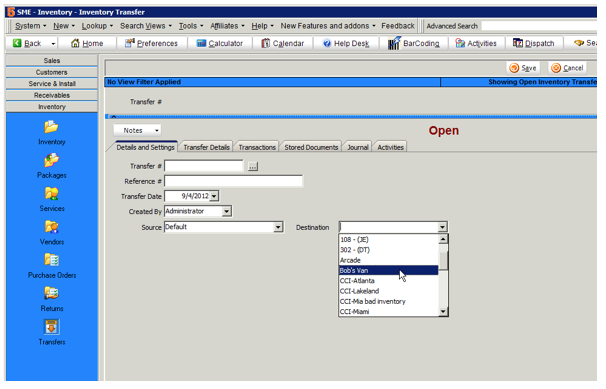
2. Go to Inventory > Transfer.
3. Click New
4. Locate the Source and Destination fields. In the Source field, select the warehouse you are transferring stock from. In the Destination field, choose the warehouse you are transferring stock to. (image below)
5. Click the Transfer Details tab.
6. Click New on the Transfer Details tab

7. In the window that opens you will see the material available to move in the Source warehouse. Select the item you need to transfer.
8. In the next window you will see shows the stock lots for the inventory item. Double click on the stock lot you want to transfer from. Note the quantity available in each stock lot.
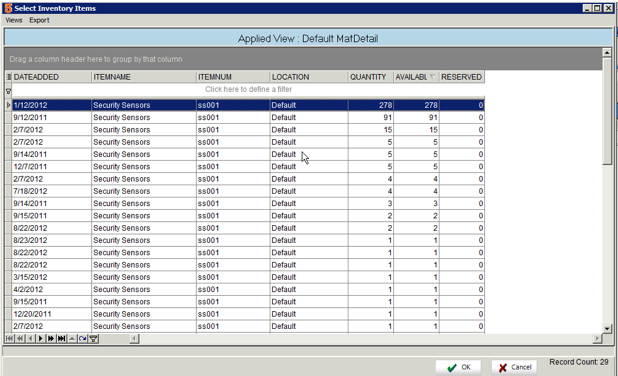
If you don’t see an “Available” column, click Views > Add Remove Fields> From Material Details and choose “Available” and click OK. The column will be added to the search view.
9. Once selected, you will see the item on the Transfer Details tab.
10. Enter the quantity you want to transfer in the Move Available column. You can’t enter more than the quantity in the Current Available column.
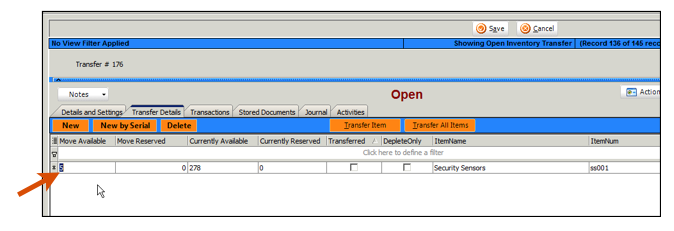
11. Continue adding the inventory items you want to include on the transfer.
12. When all items are added, click Transfer All Items.

13. The stock will be moved and the return will close.
Customer Warehouses
Customer warehouses are used if you want to keep stock in a warehouse that can only be allocated to orders for a specific customer. You will need to designate a warehouse as a customer warehouse and assign the warehouse to your customer.
Create Customer Warehouse
1. Go to Setup > Company > Orders > Lists.
2. Locate Warehouses in the Lists.
3. Click New in lower right corner and enter the Warehouse name.
4. Check Customers and enter the warehouse address.
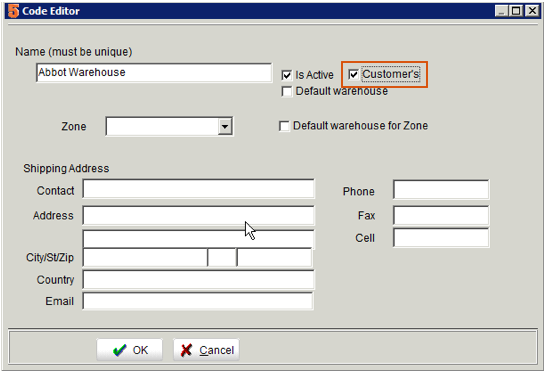
5. Click OK.
Assign the warehouse to customer
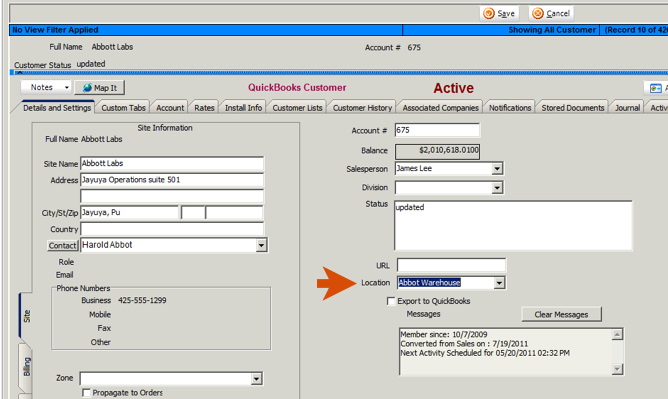
1. Go to the customer record
2. Select the customers warehouse in the Location field.
Transferring stock from Default to Customer Warehouses
1. Go to an Inventory item
2. Click Material Details tab
3. Select the line on the grid that contains the stock lot that contains the stock you want to move. Make sure you are selecting stock in the correct location and notice how many are available.
4. Click Move Stock
5. In the Move Stock window, enter the Move Quantity
6. Choose the Destination warehouse which is your Customer's warehouse
7. Click OK and the stock will be moved.
